Location & Mounting Options
Mounting Options
As part of the implementation your project manager will discuss with you the different options available with regards to locations and the mounting of InVentry hardware including screen and quick scan devices. Unless you have ordered either a visitor sign in kiosk or free standing floor mount for your screen you will have the option of using the following mount types. When deciding on a location please also take into consideration the location for the USB printer (if ordered) as this will be a USB device that can be situated no further than 5 metres away from the screen. This is a freestanding unit.
Please see the below that will assist you with deciding the best method for yourself:
InVentry Screen
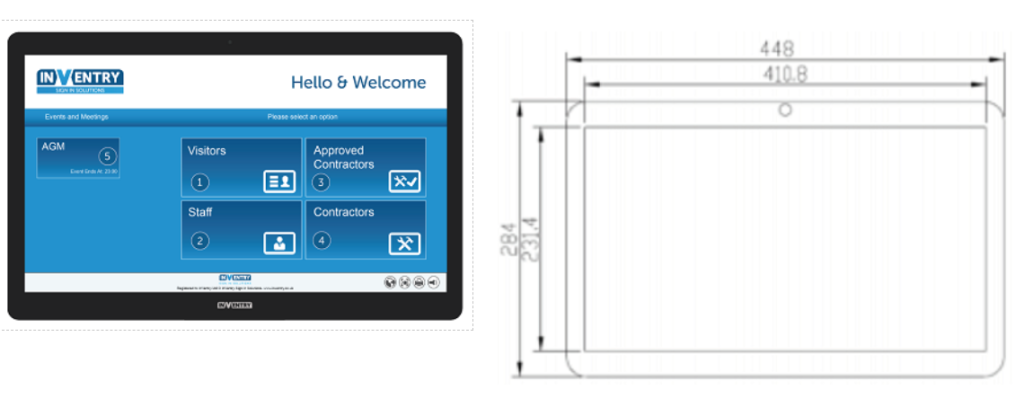
The dimensions for the InVentry screen are 448x284x30.4mm (WxHxD) and approximately 5Kg.
Wall-Mounted
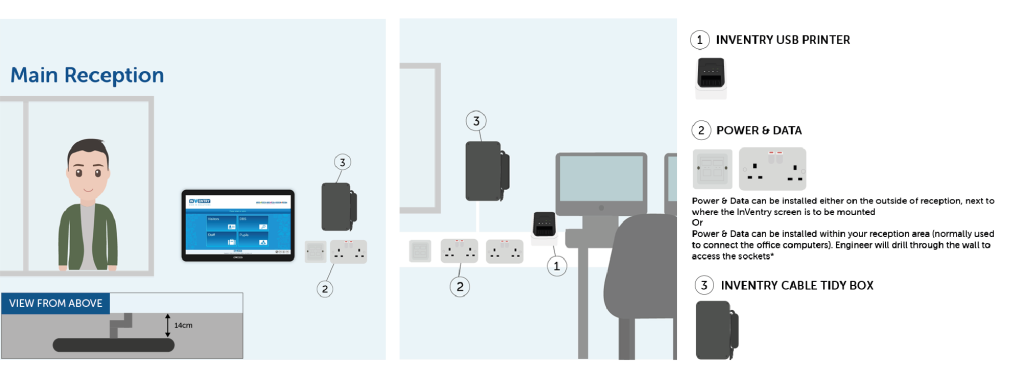
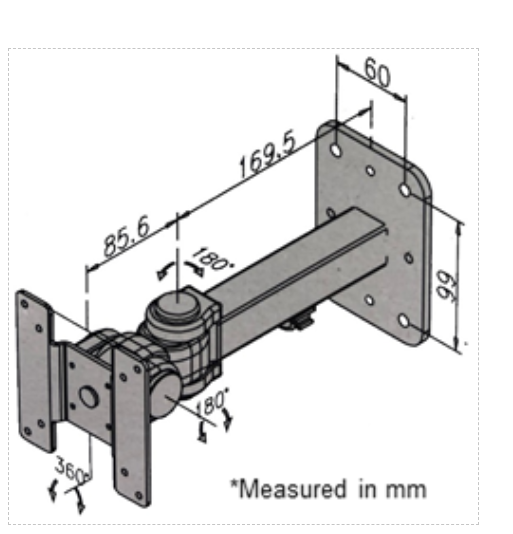
Our InVentry Wall Mount can be installed on all common wall types and will include the engineer drilling 6x 10mm holes, for the wall plate and 1x 25mm hole for the cables. The wall mount will be mounted 52 inches from the ground, to the centre of the screen, and has a ‘tilt’/ ‘swing’ facility. This feature allows wheelchair users to pull the screen out towards them and tilt is downwards, so they are able to sign in/ out with ease.
Desk-Mounted
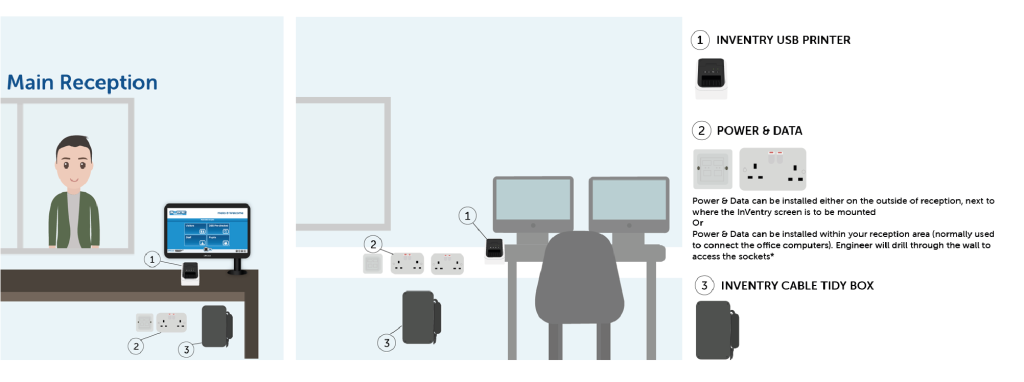
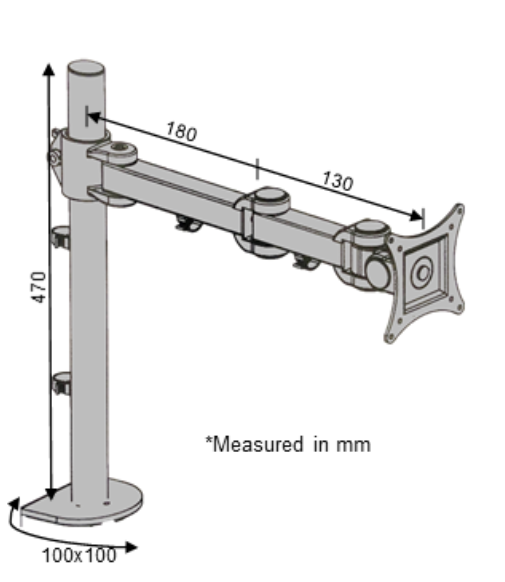
Our InVentry Desk Mounting option can be installed on most desk style surface, excluding; Granite, Marble, Thick Metal or Glass. The engineer will start off by mounting the base plate, which includes drilling a 10mm hole for the thread bold and a 25mm hole for the cables. They will then construct the remaining desk mount and will screw it to the baseplate. The mount has a ‘tilt/ swing’ facility which allows wheelchair users to pull the screen out towards them and tilt is downwards, so they are able to sign in/ out with ease.
Floor-Mounted Stand
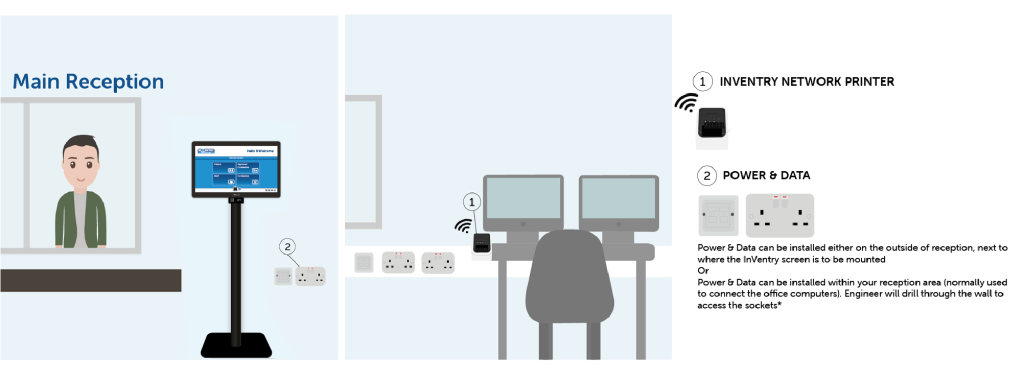

Our InVentry Floor Mounted Stand can be installed on any level floor surface. The stand is designed to be left supported by its own weighted base plate, preventing the stand from swaying. The central support will house all of the cables that run from the back of the InVentry screen to the floor, along with the InVentry system powerbrick, meaning minimal cables will be on display. The stand does not include an in-built label printer, but an InVentry network label printer will be provided with the stand. This network printer can be situated in any location where there is network connectivity (ethernet port or Wi-Fi). When the InVentry screen is attached to the stand it has a ‘tilt’ facility. This feature allows wheelchair users to tilt the InVentry screen downwards towards themselves, so they are able to sign in and out with ease.
**Please Note – There is an additional cost to purchase a Floor Mounted Stand. For further information, please contact a member of the InVentry team.**
InVentry Kiosk
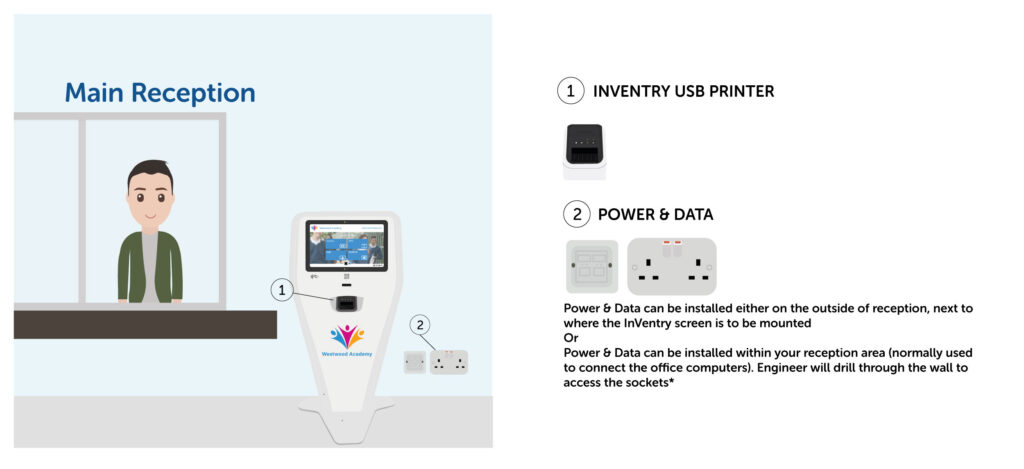
Our InVentry Kiosk can be installed on any level floor surface and is designed to be a self-service terminal. It is supported by its own weighted base and frame, so no physical installation is required. All cables are housed inside the kiosk, so no cables will be on display. The InVentry screen is located at the top of the kiosk, with a 170° viewing angle and does not move or tilt. RFID and barcode scanners are sold separately. The kiosk comes as standard in black or white with logo or branding on the front. Additional cost for complete custom color and wrapping comes with join marks.
**Please Note – There is an additional cost to purchase an InVentry Kiosk. For further information, please contact a member of the InVentry team.**
**For all InVentry Screen mount options 2x Power sockets & 1x data point are to be provided by the customer. The maximum cable run from the data point and power socket to the unit is 5 metres. Therefore, we suggest the distance between the device location and the data point and power sockets being within 3 metres to allow for wall depth and routing for the cable run.**”
Printers
USB Label Printer
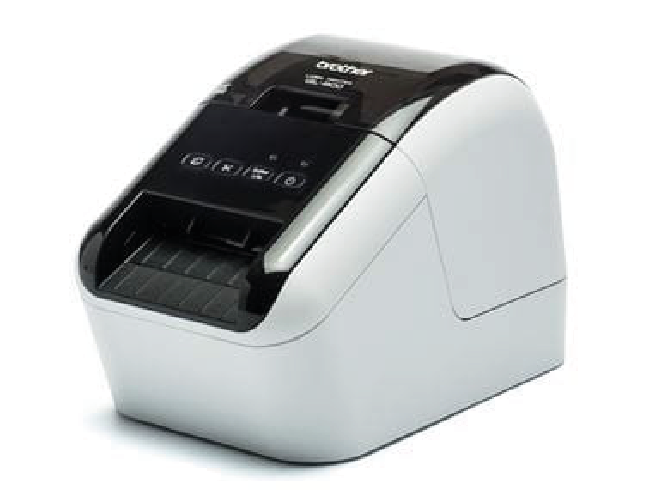
Dimensions:
21cm length x 12.5cm width x 14cm height
Installation:
Our USB Label Printers are provided with a 3m USB cable and require 1x Power Socket to operate. This means that the printer can be installed up to a maximum of 3m of where your InVentry Screen is mounted (please note, cable route will need to be factored in when measuring the length).
Network Label Printer
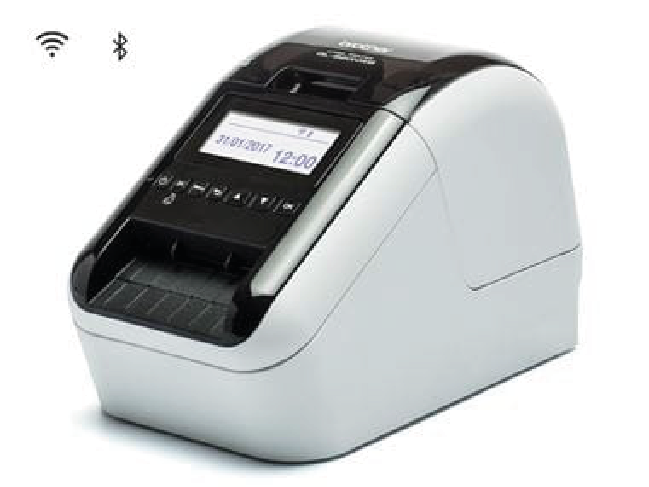
Dimensions:
23.5cm length x 12.5cm width x 14cm height
Installation:
Our Network Label Printers can connect to your network either by wire (RJ45) or wirelessly (Wi-Fi) and require 1x Power Socket to operate. This means that the printer can be installed anywhere onsite that has a wired or wireless network connection and 1x Power Socket.
Quickscan Device
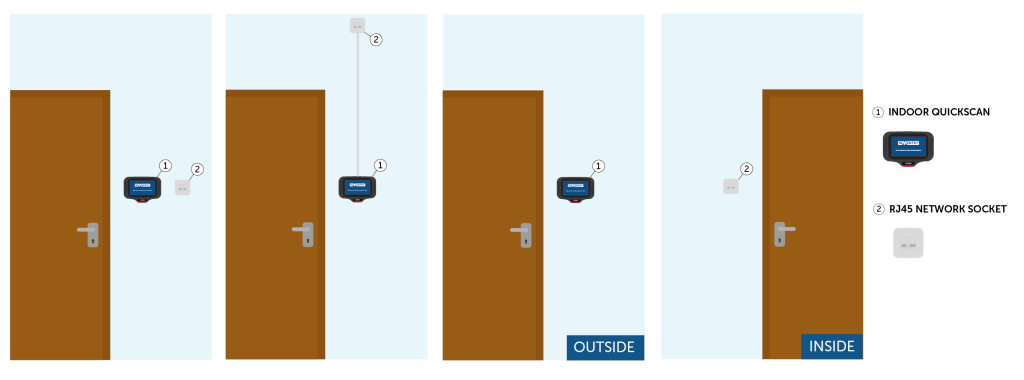

Dimensions:
23.5cm length x 12.5cm width x 14cm height
Installation:
Our Network Label Printers can connect to your network either by wire (RJ45) or wirelessly (Wi-Fi) and require 1x Power Socket to operate. This means that the printer can be installed anywhere onsite that has a wired or wireless network connection and 1x Power Socket.
Outdoor Quickscan Device
Our Outdoor QuickScan units are fully weather-proof and secure. The device allows onsite personnel, visitors and pupils to Sign In or Sign Out of the InVentry system by swiping their existing ID Card, Fob or Visitor Pass (barcode) on the Outdoor QuickScan unit.
The Outdoor QuickScan comes with a 3 year warranty. This warranty is related to the hardware only. Any changes to your network requiring alterations to the configuration of the Outdoor QuickScan will require an engineer visit which will be charged at the current site visit rate*.


*A Static IP address will be required for the Outdoor QuickScan and this will need to be provided to the engineer on the installation day. If you have ordered multiple QuickScans, we will require a static IP for each unit. We ask for a range of IP addresses to be provided, so that our engineer can successfully configure the QuickScan (for example – 192.168.0.10 to 192.168.0.14)
Outdoor Quickscan Installation Location
The Outdoor QuickScan can ONLY be installed externally, on a flat surface.
The InVentry engineer will drill from the outside to the inside of your building to connect the unit to the network socket, using an ethernet cable which we will provide. We CANNOT install the unit onto stone or pebble dashed walls or any form of fences/fence panels (including metal fence panels).
Our engineer will discuss the exact installation location and cable route on the day of your Outdoor QuickScan installation. The below shows our common installation scenarios.
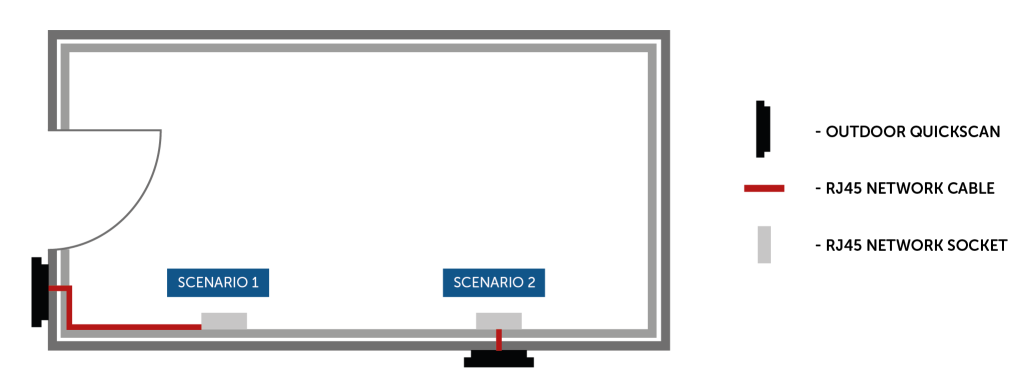
SCENARIO 1
This installation scenario has been carried out as follows:
1. The Outdoor QuickScan has been installed on the outside of the building
2. An 8mm hole has been drilled through the external wall to the inside of the building
3. The network cable has been run through the wall, to the inside of the building
4. Using white surface-mounted trunking, the cable has been run to the RJ45 network socket (which is within 3 metres) and has then been plugged in. The cable will be hidden from view, within the trunking.
SCENARIO 2
This installation scenario has been carried out as follows:
1. The Outdoor QuickScan has been installed on the outside of the building
2. An 8mm hole has been drilled through the external wall to the inside of the building
3. The network cable has been run through the wall, to the inside of the building
4. As the RJ45 Network Socket is located directly on the opposite side of the wall, the network cable has been plugged directly into the network socket, with no trunking used
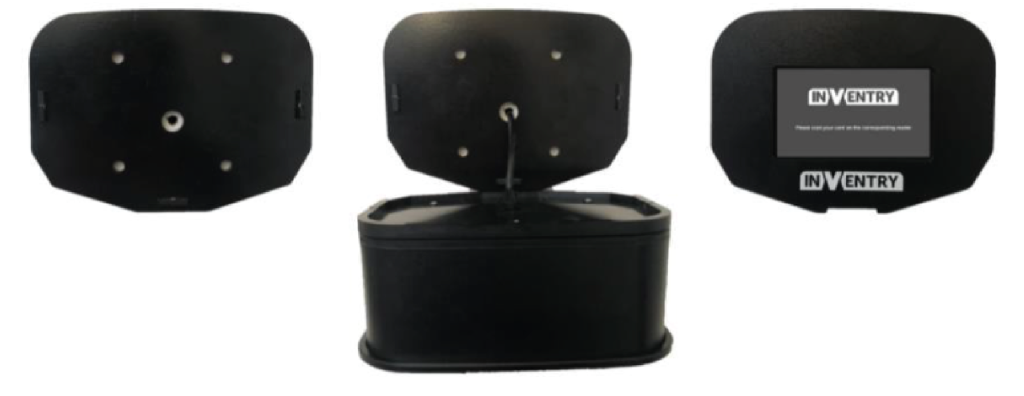
InVentry will provide the network cable to plug into the pre-installed network socket, to connect the Outdoor QuickScan to your network. In order for the Outdoor QuickScan to retain its weatherproof capability, our engineer will need to run the network cable from the rear of the unit, through the outside of your building to the inside as demonstrated below
T’s & C’s:
– If you have ordered multiple Quickscans – you will require one network socket per Quickscan device
– Our Quickscan device is powered using Power Over Ethernet (POE). Our engineer will provide you with a POE injector(s) on the installation day, which you can plug into your server cabinet. For this option, you will require a free power socket no further than 1 metre away from the server cabinet. Please note, if you have ordered multiple Quickscan units, you will require a free plug socket per unit ordered. Alternatively, if you have a POE+ switch, the network socket the outdoor Quickscan plugs into can be plugged into a POE+ port.
